Getting started
Add your first patient
From the Add Patient dialog through the patient's welcome email: the whole flow, start to finish. Everything here can be revisited and edited later.
Open Add Patient
Patients list, or Settings → Patient Setup
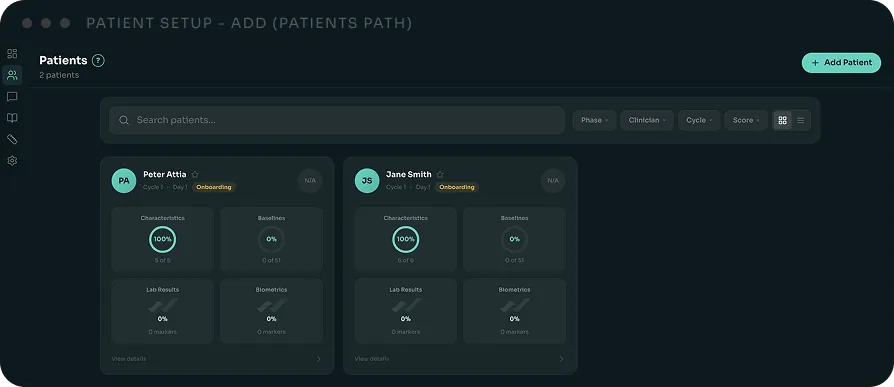
There are two ways in, and both open the same dialog. From the Patients page, click + Add Patient in the top right. Or open Settings → Patient Setup and use + Add Patient there.
The Settings view doubles as your patient roster: it shows your beta seat usage (Beta: 2/10 free patients used) and, on each row, the actions for managing a patient after they exist, like resending their invite or reassigning their clinician. Managing existing patients is its own topic; here we're focused on adding one.
Enter the patient's details
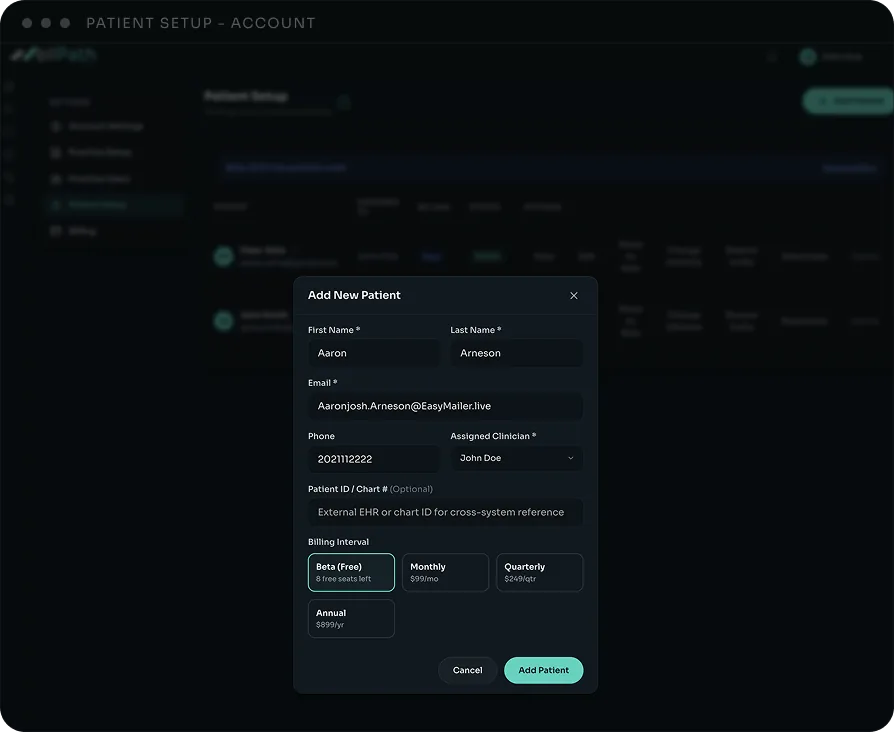
The Add New Patient dialog — this creates the patient
Enter the patient's name and email, choose an Assigned Clinician, and optionally add a phone and a chart reference.
- Email is how the patient signs in and where their welcome email lands, so it's required.
- Phone is optional and doubles as a password-recovery method; the patient can add it later from their own profile if you don't have it now.
- Assigned Clinician is who owns this patient's care.
- Patient ID / Chart # is optional; use it to carry over however you already identify patients (EMR, chart number, anything) so records line up across systems.
Then pick a Billing Interval. Beta seats are free while they last; the count updates as you use them.
If you pick a paid interval and don't have a card on file yet, WellPath collects payment first. Clicking Add Patient officially creates the patient in the platform: their welcome email goes out immediately (step 03), and they can begin entering baselines from their app right away. That's why the characteristics in step 04 are worth locking down early.
Your patient gets a welcome email
Sent the moment the patient is created
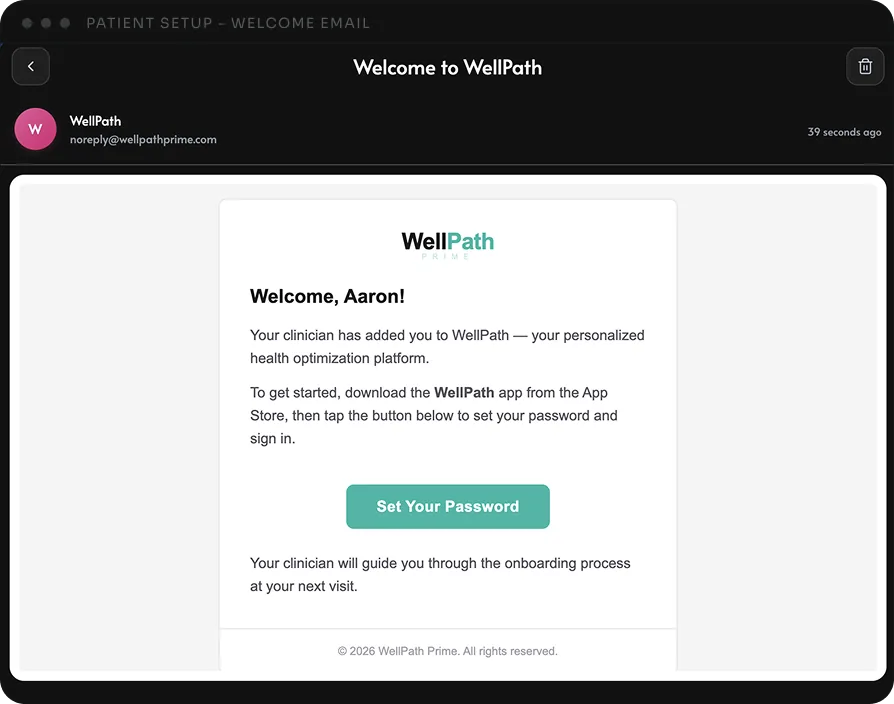
As soon as step 02 completes, WellPath emails the patient a welcome. It invites them to download the WellPath app from the App Store and tap Set Your Password to sign in.
Their clinician guides them through the rest of onboarding at the next visit, so there's nothing they have to figure out on their own. If they don't see it, you can Resend Invite from Settings → Patient Setup.
Set baseline characteristics
The inputs behind every score — worth locking in early
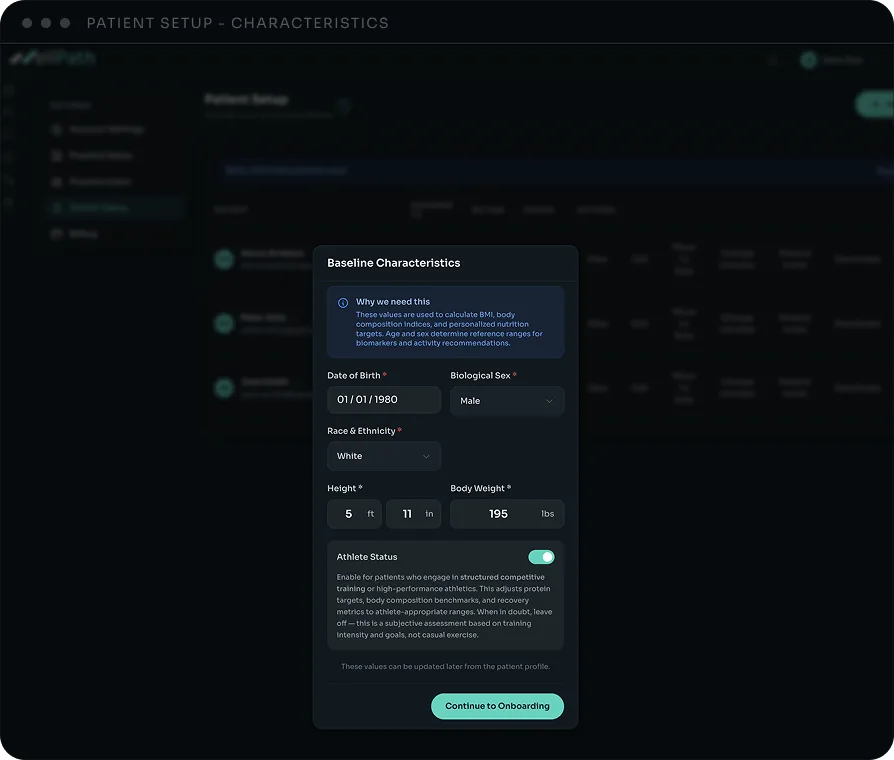
The dialog shows a brief "Why we need this" note; here's the fuller picture. These aren't just profile fields, they directly change how scores are calculated.
- Date of birth, biological sex, menopausal status (for female patients), and athlete status set the reference rangesa score is measured against. The same biomarker or behavior can land in a different band depending on these, so they change the result, not just the profile. You can browse every metric's conditional ranges in the portal under Reference → Scoring Ranges.
- Height feeds the body-composition indices: BMI and ASMI (appendicular skeletal muscle index).
- Body weight is critical for anything measured per kilogram. Protein and fat targets are scored as grams per kg of body weight (g/kg bw), so those ratios can't be computed without it.
This step is requiredand can't be dismissed. You can revisit and adjust everything anytime from the patient profile, but lock it in early: the patient can start entering baselines the moment step 02 completes, and some (like nutrition ratios) need body weight to score correctly. Click Continue to Onboarding.
Start onboarding
A guided, six-part setup on the patient's page
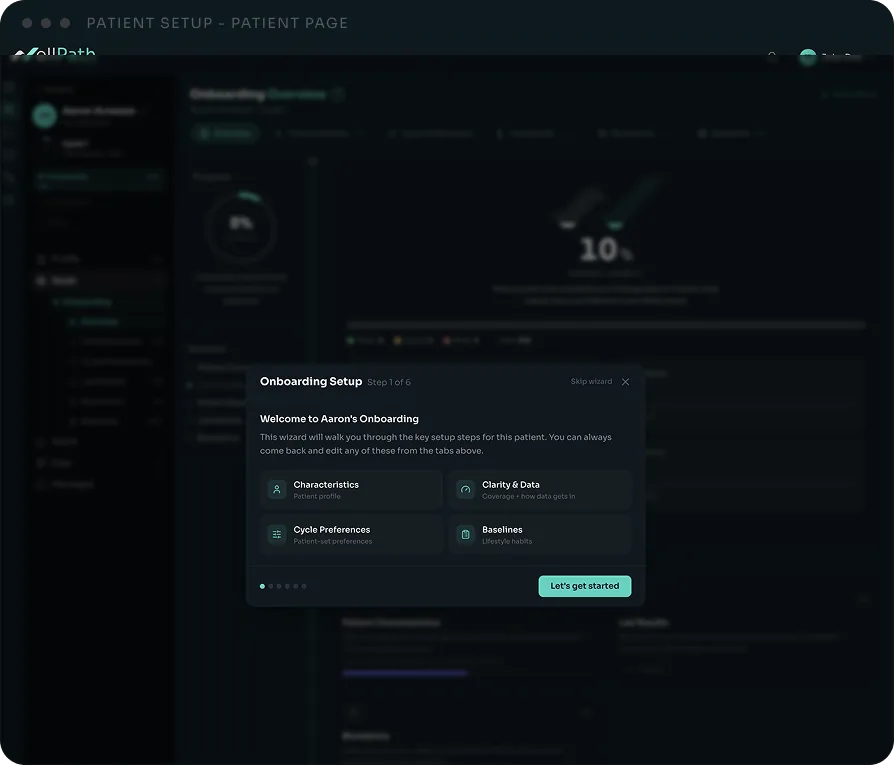
You land on the patient's Onboarding Overview. A short wizard walks the key setup steps, and the progress ring plus completeness meter track what's left. Work through it now, or skip and return anytime.
These map to the tabs across the top of the page: Overview, Characteristics, Cycle Preferences, Lab Results, Biometrics, and Baselines.
Next up: Your Practice Dashboard. Stuck? Reach us at keegan.dolan@wellpathprime.com.